Wicket + Activity Integration
Category Archives: Wicket
Wicketiviti
Wicket XML-RPC
Grab the source code from here
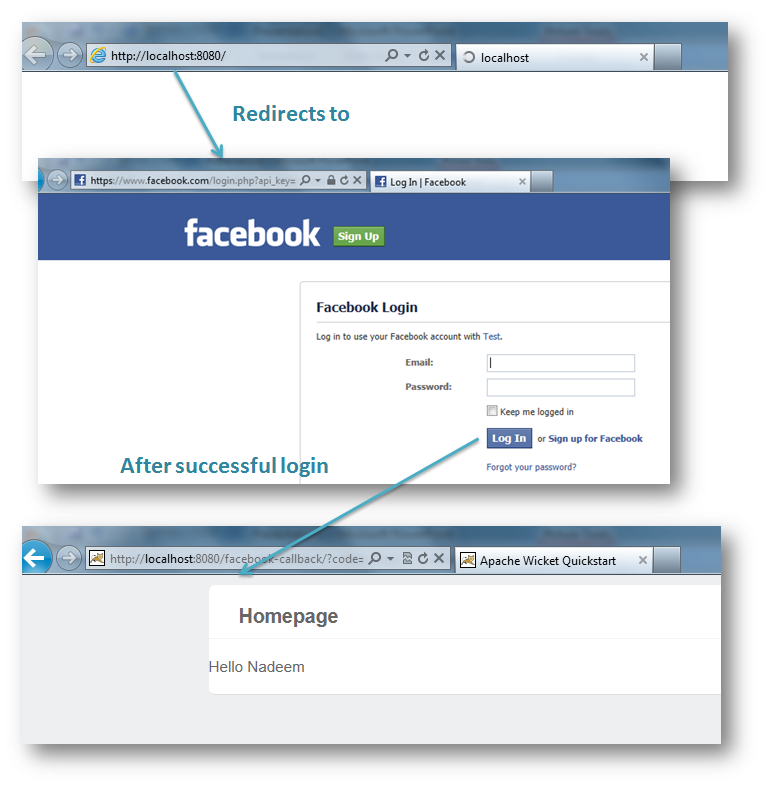
Wicket Facebook
Wicket facebook integration using scribe-java and google-gson
Step 1
Goto Fecebook Developers click on Create new App
Step 2 : Update the web.xml with the facebook App ID and Secret
Step 3
Do mvn jetty:run and go to the app as follows
Step 4 : Access the canvas page
Grab the source code from Github repo
Wicket Loose Coupling
We can do it in two ways,
-
Using Model : Partially loosely coupled , it is really worth considering
-
Using Custom Events : Fully loosely coupled
Loose Coupling Using Model
public class ChangeSensitiveModel extends Model {

	private static final long serialVersionUID = 1L;

	public ChangeSensitiveModel() {

	}

	public ChangeSensitiveModel(final T object) {
		super(object);
	}

	final public void setObject(final T newObject) {
		if (onBeforeSet(newObject)) {
			super.setObject(newObject);
			onAfterSet();
		}
	}

	protected boolean onBeforeSet(T newObject) {
		return true;
	}

	protected void onAfterSet() {

	}
}
ChangeSensitiveModel In Action
Set object to the ChangeSensitiveModel Model
private Button newButton(final ChangeSensitiveModel<ValueMap> model, final Form<ValueMap> searchForm) {
		return new AjaxButton(("sayHello")) {

			private static final long serialVersionUID = 1L;
			@Override
			protected void onSubmit(AjaxRequestTarget target, Form<?> form) {
				model.setObject(searchForm.getModelObject());
			}
		};
	}
Override the call back
public LooseCouplingUsingModelPage() {

		changeSensitiveModel = new ChangeSensitiveModel(){

			private static final long serialVersionUID = 1L;

			@Override
			protected void onAfterSet() {
				LooseCouplingUsingModelPage.this.addOrReplace(new ResultPanel(RESULT_PANEL_ID, changeSensitiveModel));
				AjaxRequestTarget ajaxRequestTarget = AjaxRequestTarget.get();
				if (ajaxRequestTarget != null) {
					ajaxRequestTarget.addComponent(LooseCouplingUsingModelPage.this.get(RESULT_PANEL_ID));
				}
			}
		};
		add(new SearchPanel(SEARCH_PANEL_ID, changeSensitiveModel));
		add(newEmptyPanel());
	}
Loose Coupling Using Custom Event
Firing an Event
new RefreashFeedBackPanelEvent(SearchPanel.this, target, searchForm.getModelObject()).fire();
Responding to Event : Any component wanting to respond to Customer event should implement AjaxUpdateListener
public void handleAjaxUpdate(final AjaxUpdateEvent event) {
		if (event instanceof RefreashFeedBackPanelEvent) {
			info("You said : " + ((RefreashFeedBackPanelEvent)event).getSourcData().getString("name"));
			event.getTarget().addComponent(feedbackPanel);
		}
	}
Go Grab the source code from GitHub
do mvn jetty:run and see the example in Action.
Wicket Ajax Radio
Wicket provides couple of built-in ajax enabled components for example AjaxButton, AjaxLink, and most importantly AjaxCheckBox and astonishingly there is no AjaxRadio,
Potential Reasons for no built-in ajax enabled Radio Component
- Point 1
- Point 2
Never mind, the beauty of Wicket is you can do anything in Wicket which can be done in JAVA
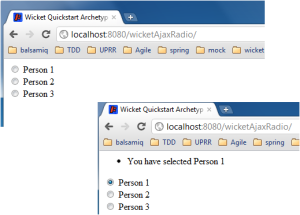
So lets create that missing component, Here is how that component would work
I would be using the following built-in components from Wicket core libraray:
- Radio (To render HTML Radio)
- RadioGroup (Radios don’t exist alone, every Radio is bound to a group, RadioGroup will hold the current selection)
- AjaxEventBehavior (onClick behavior is bound to each individual Radio )
- Form (To post the current status of Radio, i.e, which one is currently selected)
- Listview (repeatedly display all the Radio, this is going to be dynamaic )
I am going to create two classes for this component :
- AjaxRadio : This class is pretty simple it simple adds Wicket Radio and AjaxEventBehaior to each Radio
- AjaxRadioPanel : This is the main component.
AjaxRadio
AjaxRadio is extending Radio (Wicket core component) and adding onclick ajax behavior, this event will submit the current status of the Radio component to Server whenever the even occurs (onClick in this case)
public abstract class AjaxRadio extends Radio {

	private static final long serialVersionUID = 1L;
	public abstract void onAjaxEvent(AjaxRequestTarget target);

	public AjaxRadio(String id, IModel model) {
		super(id, model);
		addAjaxBehavior();
		setOutputMarkupId(true);
	}

	 private void addAjaxBehavior() {
        add(new AjaxEventBehavior("onclick") {
             private static final long serialVersionUID = 1L;
             protected void onEvent(final AjaxRequestTarget target) {
                 RadioGroup radioGroup = getEnclosingRadioGroup();
                 radioGroup.processInput();
                 onAjaxEvent(target);
             }

			protected final CharSequence getEventHandler() {
                 return generateCallbackScript(new AppendingStringBuffer("wicketAjaxPost('")
                                                     .append(getCallbackUrl())
                                                     .append("', wicketSerialize(Wicket.$('")
                                                     .append(AjaxRadio.this.getMarkupId())
                                                     .append("'))"));
             }
         });
     }

     private RadioGroup getEnclosingRadioGroup() {

         RadioGroup group = (RadioGroup) findParent(RadioGroup.class);
         if (group == null) {
             throw new WicketRuntimeException("Radio component ["
                     + getPath()
                     + "] cannot find its parent RadioGroup. All Radio components must be a child of or below in the hierarchy of a RadioGroup component.");
         }
         return group;
     }
}
AjaxRadioPanel
The main job of this class is to repeatedly add the AjaxRadio component, and provide a callback if the Radio is update, so that client can do some operation
public abstract class AjaxRadioPanel extends Panel {

	private static final long serialVersionUID = 1L;

	protected abstract void onRadioSelect(AjaxRequestTarget target, T newSelection);

	public AjaxRadioPanel(String id, List items, String propertyExpression) {
		this(id, items, null, propertyExpression);
	}

	public AjaxRadioPanel(String id, List items, T currentSelection, String labelPropertyExpression) {
		super(id);
		add(buildForm(items, currentSelection, labelPropertyExpression));
	}

	private Form buildForm(List items, T currentSelection, String labelPropertyExpression) {
		Form form 		= new Form("form");
		RadioGroup group = new RadioGroup("radioGroup", new Model(currentSelection));

		group.add(newRadios(group, items, labelPropertyExpression));
		form.add(group);
		return form;
	}

	private Component newRadios(final RadioGroup group, List items, final String labelPropertyExpression) {
		return new ListView("radioButtons", items) {

			private static final long serialVersionUID = 1L;

			protected void populateItem(ListItem item) {
				item.add(newAjaxRadioCell(group, item));
				item.add(new Label("label", new PropertyModel(item.getModel(), labelPropertyExpression)));
			}
		};
	}

	private AjaxRadio newAjaxRadioCell(final RadioGroup group, ListItem item) {
		return new AjaxRadio("radio", item.getModel()) {

			private static final long serialVersionUID = 1L;

			@Override
			public void onAjaxEvent(AjaxRequestTarget target) {
				onRadioSelect(target, group.getModelObject());
			}
		};
	}
}
How to Use this component
Simply add AjaxRadioPanel to your container
add(new AjaxRadioPanel(RADIO_PANEL_ID, getPersons(), "name") {

			private static final long serialVersionUID = 1L;

			@Override
			protected void onRadioSelect(AjaxRequestTarget target, ValueMap newSelection) {
				info("You have selected " + newSelection.getString("name"));
				target.addComponent(feedbackPanel);
			}

    	});
TODO : Update more…
Get the source code from Git Hub
Wicket Editable Grid
NOTE : Editable Grid is now part of Wicket Stuff
Editable Grid, can be downloaded from M2 Repo and Sonatype Repo
Wicket users desperately need a grid with add/edit/delete functionality at once, Here are the couple of forums :
Wicket Stuff does provide a component, however it does not have the ‘add’ functionality. Hence i have decided to write my own ;-).
Sample Screen Shot
How to Use this Component
It is very simple, Editable grid needs the following:
- Columns, there are lots of predefined columns, however you can sub class existing classes to provide your own customized one.
- List of Row Objects, it may be empty.
- Backing object for the footer, Which lets you add new objects
 add(new EditableGrid("grid", getColumns(), getPersons(), new Person()) {

			private static final long serialVersionUID = 1L;

			@Override
			protected void onError(AjaxRequestTarget target) {
				target.addComponent(feedbackPanel);
			}
		});

 private List> getColumns() {
		List> columns = new ArrayList>();
		columns.add(new RequiredEditableTextFieldColumn(new Model("Name"), "name", false));
		columns.add(new RequiredEditableTextFieldColumn(new Model("Address"), "address"));
		columns.add(new AbstractEditablePropertyColumn(new Model("Age"), "age") {

			private static final long serialVersionUID = 1L;

			public EditableCellPanel getEditableCellPanel(String componentId) {
				return new EditableRequiredDropDownCellPanel(componentId, this, Arrays.asList("10","11","12","13","14","15"));
			}

		});
		return columns;
	}
How It Works
TODO : Explain..
Features
- Feature 1
- Feature 2
- Feature 3
TODO : Update….
Grid in Action
Get the source code from Github and do mvn jetty:run in the command prompt.


